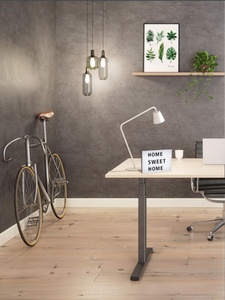
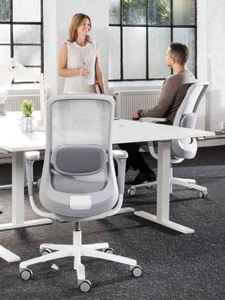
When making the transition to working from home figuring out where is the best place to set up shop can be tricky. The kitchen table may have been a reliable location for intermittent homeworking but given the increasing likelihood of a lengthy spell at home it may be best to consider a separate room. It can be tempting to get to work balancing a laptop on your knees while sprawled on a couch, working at a dining room table or kitchen counter. But creating a space for yourself that you can comfortably spend prolonged periods each day will help you maintain productivity and efficiency.
Choosing your Work Area
When deciding on where to work from home there are a couple of aspects to consider before setting up.
- Avoid distractions.
Try to stay away from areas where there may be distractions. We’ve all seen the BBC News reporter attempting to work from home through the invasion of his two children. Try to have a designated area that will, for the most part, be free from distraction. Set boundaries with your housemates or family for your working times too. Try to have an area where there is natural light and good ventilation i.e. a window that you can open. This will help circulate fresh air and keep you feeling fresh.
- Give yourself space:
Considering you will be using this area for multiple hours a day, it is important to have adequate space to get up and move around, as well as storing everything you need for your work tasks i.e. files, notebooks etc.
Setting up Screen Height
One of the main areas of concern for homeworking is monitor height. If you have a separate monitor it’s a little easier. Unfortunately, many people will be restricted to using the laptop on the kitchen table over the next while, this tends to increase neck and shoulder pain from leaning forward. The average head weighs approximately 4.5kg if you tilt the head forward 15 degrees forward, this can increase the loading to 12kg of load, if we tilt it another 15 degrees forward the load has now risen from 4.5kg to 18kg of load. This is not a problem for short periods but if you are working for long periods the accumulation of additional load can cause problems.
Working with a laptop
DIY / Temporary / Minimal Usage
The main thing we want to do is elevate the laptop screen and push the laptop back further on the desk to allow us to sit with our head more naturally balanced, then we need a separate keyboard and mouse so we can sit back into our chair instead of leaning forward.
Regular Usage
A laptop stand with a separate keyboard and mouse will give you more flexibility in screen angle and viewing position, so this will help you mimic your office setup better
Have a monitor available
If you’re lucky enough to have a monitor available, it is great. It will generally be a bigger screen, so will be easier to work with. Now we need to raise the top of the screen to about eye level to allow the head sit in balance. Again.
DIY / Temporary / Minimal Usage:
Again, go rooting for the phone books or boxes and get that monitor raised to eye level. Be careful when stacking items and make sure to test how sturdy the books/boxes are, the last thing we want is a smashed iMac!
Regular Usage:
If you’re short on space, a monitor arm is the best solution as this will elevate your monitor to the correct working height while freeing up desk space. A monitor stand will also raise your screen while allowing the space under it to be used for storage. These solutions give better flexibility in screen positioning and also create more usable space to allow your home to be used as a home, rather than just a workspace
Selecting the right chair for working at home
When we sit down, we naturally take a rounded posture that increases the load on the lower back, which over time increase strain and wear and tear, which can lead to back pain. When doing computer, we are reliant on the support and fit of the chair to assist our posture, so make sure you select the right chair at home for you.
DIY / Temporary / Minimal Usage:
When you are selecting a chair for home, you want to make sure the back support is relatively upright, so it supports you when you are working on the laptop. The right size chair is also important, as you want to be able to sit back into chair comfortably without pressure on your legs. The kitchen/dining chairs tend to be most appropriate in the absence of an office chair
If your kitchen chair isn’t supportive enough or is too deep that you can’t sit back into the backrest, then you can add a rolled up towel or an inflatable/memory foam back support to the chair, this will help support a neutral curvature, maintaining an elongated ‘S’ shape of your spine. Alternatively, if you are having lower back pain or pressure sensitivity, introducing a seat wedge will provide a more comfortable and supportive surface while opening your hip angle which will take the pressure of your lower back.
Regular Usage:
If the kitchen chair doesn’t allow you to work in comfort it may be worthwhile reviewing ergonomic chair options for your home. If this is the case be sure to select an option that can be adjusted to your anthropometric requirements and one that will provide sufficient support when sitting for long periods. Keep the below features in mind when picking your chair.
- Height and tilt adjustable backrest - This will allow you to sit back into the chair well supported with regular light movement.
- Height Adjustable Seat – If you are sitting too low in your seat there’s a closed hip angle which can encourage lower back discomfort and worsen pre-existing lower back injuries.
- Depth Adjustable Seat Pan: This may not have crossed your mind, but if your seat pan is too deep it will encourage you to sit forward and away from the back rest. This will result in lower back discomfort also.
- Height Adjustable Armrests: If your chair has armrests that are adjustable, make sure to have them parallel to your forearms when at 90 degrees. If your chair does not, make sure you sit close to table so the table can act as your armrests. Do not buy armrests if they are too deep as they will obstruct your access to the desk. Ideally the armrests will be depth adjustable so you can push them back and allow you to sit into the desk.
It’s likely you’ll be restricted to a kitchen or dining room table. If you’re a step ahead with a desk in place, happy days! Kitchen tables are generally 76cm, where office desk heights are usually 72-74cm. This additional worksurface height may result in your elbows falling below the desk. This will result in either hunching of the shoulder while working or pressure on your forearms and wrists. Like when you’re at work try to pick a workstation that when you sit into it your shoulders are relaxed and elbows are at 90 degrees. This will ensure you aren’t working in a hunched position or leaning forward to unload onto the table.
DIY / Temporary / Minimal Usage:
If your feet are dangling, you can mimic your office footrest by piling a couple of books on the ground to place your feet on. Again, here is another time you can use the seat wedge to raise your sitting height and take the pressure of your wrists and forearm.
Regular Usage:
Introduce a footrest to give a firm surface
Creating a DIY Sit-Stand Desk
Having a sit-stand desk is a brilliant help in managing discomfort at home. We are not designed to sit in fixed positions and being able to vary our working position is very beneficial. If you’re used to a sit-stand in the office, it may be difficult adjusting to a fixed height table at home. A great tip here is to use a bedroom dresser as your workstation.
DIY / Temporary / Minimal Usage:
Depending on your dresser dimensions, it may be a good fit to act as your makeshift sit-stand. It will be important to raise your monitor with books or a box, so the top of the screen is at eye level and you aren’t causing neck discomfort from looking down.
Regular Usage:
If you regularly work from home and want the opportunity to work while standing, you can look at an electric sit-stand desk or a sit-stand adapter that can go on an existing table.
Set Up Your Workspace Ergonomically
Once you have all your equipment it’s important to set your workstation up ergonomically. Office Ergonomics involves making sure your workstation and your equipment fit you, rather than you contort yourself to fit your setup. Take these simple steps to set yourself up for comfort and productivity in your new work area:
- Keep your feet flat on the floor or on the pile of books/footrest if your feet are dangling.
- Sit with your hips slightly above your knees with shoulders relaxed and elbows at 90 degrees with forearms resting on the table.
- Adjust the lumbar support or towel on your chair to sit just above your waistband into your lumbar spine.
- If you have an office chair that has an adjustable tilt mechanism, adjust this to match your bodyweight. This will enable you to incorporate regular movement into your working day and take the load off your lower back.
- Keep the top of your monitor at or as close to eye level as possible. You shouldn’t need to strain your neck while working.
- Place your monitor at an arm’s length away from you to avoid eye strain.
- Ensure you have sufficient lighting in your workspace to avoid eye strain. It may be worth grabbing that old desktop lamp from the attic.
- Use a separate keyboard and mouse.
- Incorporate regular breaks from your work area to encourage movement.
- Make sure the ground around you is free of tripping hazards, we all know how painful stepping on a piece of Lego is!
- Prepare your table/desk with all your necessary equipment for work. Keep frequently used items in close reach to stop overreaching which is a cause of upper back and shoulder pain. Try to keep none work related things or things that may distract you off your work desk/table.
Set yourself up correctly before the onset of pain or discomfort!


